Scope: Prime Mover Pro
Background
In the Prime Mover Pro version, it’s possible to exclude some media files from your WordPress content/uploads directory when you export a site for WordPress migration/backup.
This setting is called “Export Filter.” However, this setting ONLY excludes files when they are inside your WordPress uploads directory.
Uses
Sometimes, very large or unrelated files lurk in your wp-content/uploads directory. An example is large media files like videos or MP3s that you cannot delete because they might be used somewhere else.
When you export a site with Prime Mover that includes media files, the entire uploads directory is exported by default. This includes large files that you might not need at the restore end.
It might be folders that you don’t need, not only files. For example, there is a massive log folder that you cannot delete because it’s still used, but you don’t want to include that log folder.
How does Prime Mover exclude media Files?
Prime Mover supports three types of exclusion. These types should be enough to cover all possibilities of excluding files when exporting a package.
- Exclude by file. This should be a relative path to the file and include a complete file name. Use this if you want to exclude on a per-file-name basis.
- Exclude by folder. This should be a relative path to the folder.
- Exclude by extensions. In general, if you want to target all extensions, you can do so. For example, if you want to exclude all mp3 files, any mp3 files will be excluded regardless of where they are located inside the uploads directory.
Exclude by File – Syntax Examples
Prime Mover implements exclusion syntax as a command to exclude files, folders, and extensions. This is very easy to use; refer to the following examples.
For example, you want to exclude two big files inside your wp-content/uploads directory.
These files are examplebigfile.mp4 and anotherbigfile.wav. For example, the absolute path to these files is:
/home/test/www/wp-content/uploads/2019/04/bigfile.mp4
/home/test/www/wp-content/uploads/2019/04/anotherbigfile.wav
The syntax to exclude these two files is as follows (relative to uploads directory path /home/test/www/wp-content/uploads/
files-1 : "2019/04/bigfile.mp4", "2019/04/anotherbigfile.wav"
files-1 means you want to implement the file exclusion in a single WordPress site. If you want to exclude a file in a multisite environment, change 1 to any blog ID.
For example, say you export a subsite with a blog ID 54321. If you want to exclude the above files, then the syntax will be:
files-54321 : "2019/04/bigfile.mp4", "2019/04/anotherbigfile.wav"
In multisite, note that there is still one uploads directory for all subsites. But each subsites are differentiated by a blog ID folder name inside a “sites” folder (blogs.dir for older multisite configuration)
For example, you want to exclude this file from the blog ID 58 site.
/home/www/sourcecode/mysite/wp-content/uploads/sites/58/GeoIPv6.dat
Then the syntax to exclude should be relative to /home/www/sourcecode/mysite/wp-content/uploads/sites/58/, which itself is the actual uploads folder path for blog ID 58:
files-58:"GeoIPv6.dat"
Exclude by Folder – Syntax Examples
The syntax for excluding a folder is very similar to excluding a file. Except that you want to explicitly provide the folder exclusion path and tell Prime Mover that it’s a folder, not a file.
For example, say you want to exclude these two large folders inside your WordPress single site uploads directory, and these are the absolute paths:
/home/test/www/wp-content/uploads/2019/04/some-large-folder/
/home/test/www/wp-content/uploads/special-giant-folder/
The syntax to exclude will be:
folders-1 : "2019/04/some-large-folder", "special-giant-folder"
In a multisite, there is only one exclude setting available to network administrators. However, you can implement exclusion filters for each subsite if you add the correct blog ID in the exclusion syntax, just like with files.
For example:
folders-67 : "2019/04/some-large-folder", "special-giant-folder"
folders-3 : "2019/04/my-movies"
In the above example, the my-movies folder of subsite blog ID 3 will be excluded if it is exported by Prime Mover.
In multisite, for example, if you want to exclude this folder path:
/home/www/sourcecode/mysite/wp-content/uploads/sites/58/2019
The syntax to exclude should be relative to /home/www/sourcecode/mysite/wp-content/uploads/sites/58/, which is the actual uploads folder path for that multisite subsite:
folders-58 : "2019"
Exclude by Extensions – Syntax Examples
If you want to exclude files by extension, the same principle applies to folders and files. You must explicitly provide that you are filtering by extension and the blog ID ( 1 for single-site).
Supposing you want to exclude the following movie extensions: avi, zip, mp4 in your WordPress single-site.
The syntax to exclude will be:
extensions-1 : "avi", "zip", "mp4"
Suppose your site is using a multisite configuration. You can implement extension exclusion per site by identifying each rule with a specific blog ID. For example, if you want zip to be excluded on blog ID 34, exclude all three file types in blog ID 65.
extensions-34 : "zip"
extensions-65 : "avi", "zip", "mp4"
Implement Media Exclusion in Prime Mover Pro Settings
- Login as administrator/network administrator.
- Go to Prime Mover -> Settings.
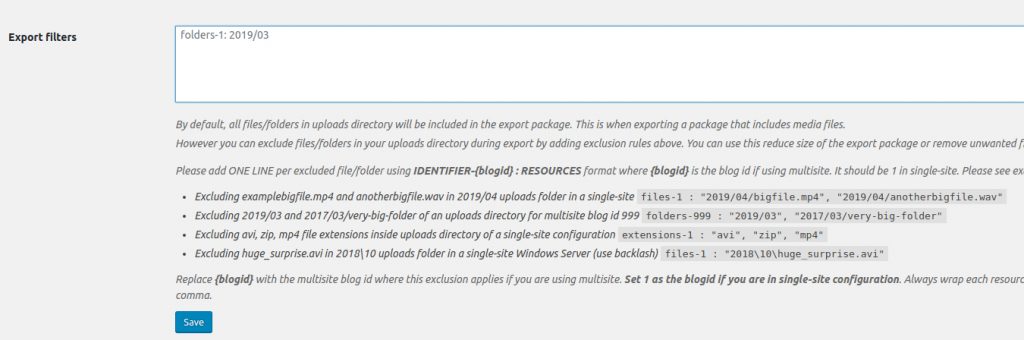
- Scroll down and find Export filters.
- Add your exclusion rules using the correct syntax. All you need is the proper path to the file or files. Prime Mover validates these rules when you save them to ensure they are applicable. They won’t be saved if the rule is incorrect (e.g., the file does not exist or the path is wrong).
- Finally, once you have all the rules, click Save.
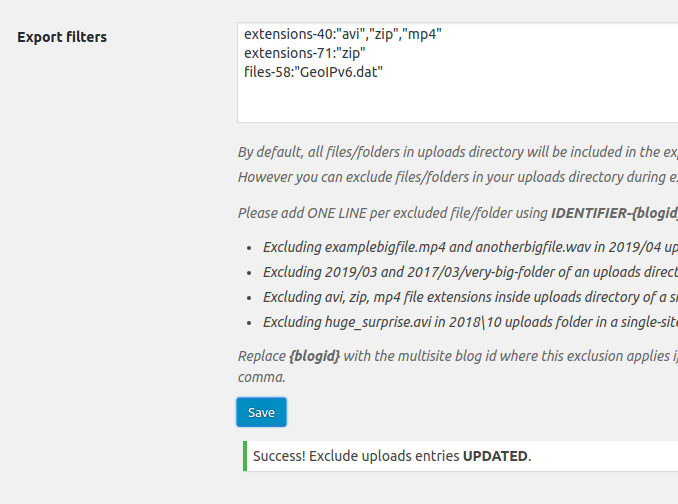
You can input several rules for several sites; you can separate each of them one per line. For example, below are some rules implemented in a multisite using Prime Mover Pro:
Usage Tips
- Use your host FTP / SFTP / SSH access to access the correct file path.
- You can use the WordPress Media Library screen, which is available inside the WordPress admin, to get the correct path of the media to exclude.
- Use WordPress plugins like WP File Manager to browse your uploads folder directly inside your WordPress admin: https://wordpress.org/plugins/wp-file-manager/. Then, using that, you can get the correct paths to the folder/file to exclude.
What is also great about WP File Manager is that it will give you the total file size of the folder or file. So you can use that to scan your uploads directory for big files or folders and exclude them in Prime Mover settings.
- If you use the FREE version of Prime Mover, you don’t have this setting available. One feasible solution is to export the site as a debug package. See screenshot:
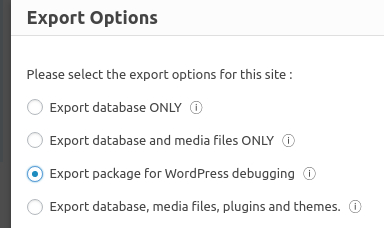
This works by allowing you to export a complete site with plugins/ themes and a database. The only difference is that WordPress uploads are excluded from the export.
When you restore this, the image will resolve to the source site. Prime Mover does its best to handle this adjustment. So, the image will still show after restoring a debug package.
This is very helpful if you are a tech supporter and want to quickly clone a big site to your local for quick WordPress debugging.
Last updated: February 22, 2025