Background
If you notice that some of your scheduled backup processes have stalled and are no longer progressing, they must be restarted to continue creating backups.
Please note that backups might take some time to complete (depending on your site and server speed). Give it time before you decide to restart the scheduled backup process.
When to restart scheduled backups?
There are many reasons why scheduled backups should be restarted. Some of them go beyond the scope of the Prime Mover PRO plugin and even the WordPress platform itself. Below are some reasons:
- Your server restarts while the scheduled backup is running. This clears up the memory and running processes, resulting in stalled backups.
- Your hosting executes scheduled server maintenance. These maintenance tasks can be anything, from installing new software to updating old software to cleaning up your server. Once these updates refresh the running site, any running processes, including automatic backup, get stalled and need to be restarted.
- You establish a backup timeout that exceeds the timeout of your hosting server. For instance, your hosting timeout is 60 seconds, yet you have set it to 180 seconds. Your host could silently kill these processes without putting any errors in the logs. The solution would be to set a conservative backup timeout and restart the backup process.
- You scheduled too many backups to run simultaneously, using more hosting resources than you should have. Your hosts can kill them quietly. The solution is to spread out your scheduled backups and not let them all run simultaneously.
Before you can restart scheduled backups
- Ensure that the site you need to restart the automatic backups has the PRO license activated. Otherwise, you cannot set and save the settings below.
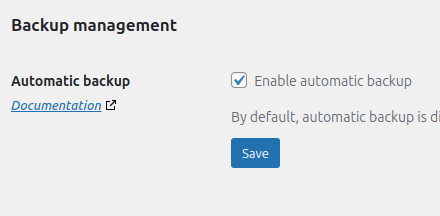
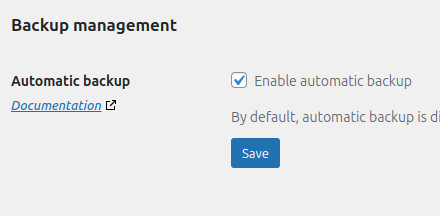
- This tutorial assumes automatic backup is already globally enabled before you can restart any process. You will know that the automatic backup is globally enabled by going to Prime Mover PRO -> Settings -> Backup management -> Automatic backup.
- If this option is checked, automatic backups are enabled globally. If it is not checked, check it out first and save it.
Steps to safely restart automatic backups
- Login to your WordPress site as administrator (network administrator if multisite).
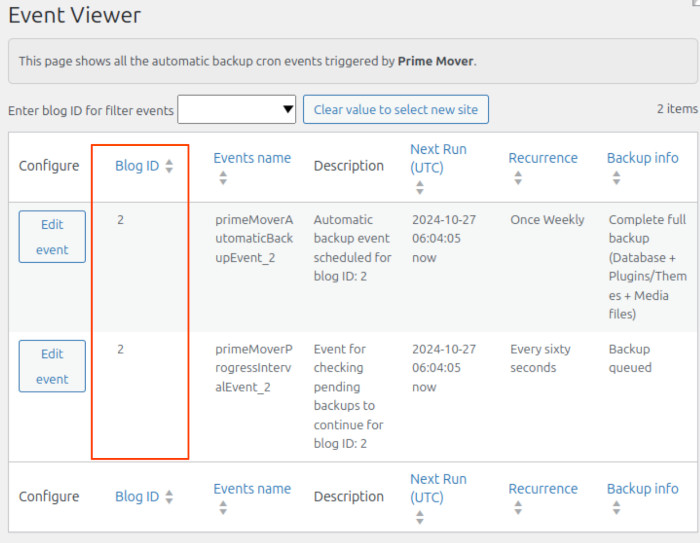
- [If your site is multisite]: Go to Prime Mover PRO -> Event Viewer. Confirm and get the blog ID of the affected site so you can restart the scheduled backups.
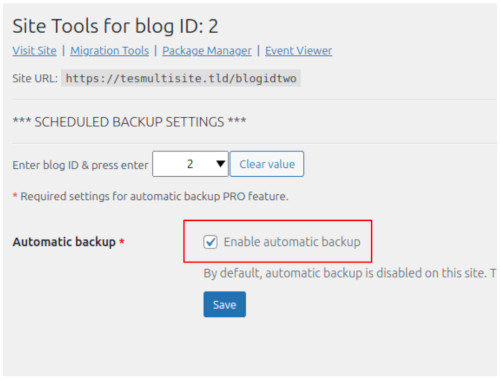
- [If your site is multisite]: Go to Prime Mover PRO -> Toolbox. Enter the blog ID of the affected subsite. Uncheck the ‘Enable automatic backup’ checkbox, and click the “Save” button. This will turn off the automatic backup only for that specific multisite subsite.
- [If your site is single-site] – Go to Prime Mover PRO -> Settings -> Backup management -> Automatic backup. Uncheck the ‘Enable automatic backup’ checkbox and click the “Save” button. This will turn off the automatic backup for your WordPress single site.
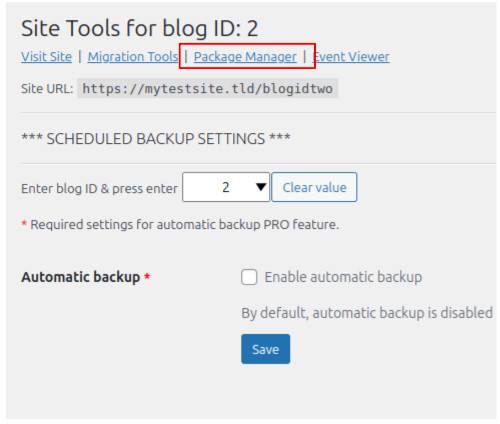
- [If your site is multisite] Click the “Package Manager” link in the breadcrumb navigation above as indicated in this screenshot:
- [If your site is single-site] Go to Prime Mover PRO -> Packages.
- On the site’s package manager page, click the “Refresh packages” button. This will clear and delete any artifacts or incomplete packages.
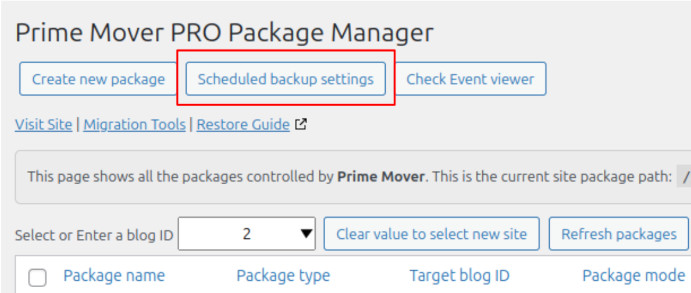
- On the package manager page of the site – click the “Scheduled backup settings” button as indicated in this screenshot:
- Scroll down to the bottom of that site’s Sites Tools / Scheduled backup settings page.
- Click the following three red buttons in the following order:
- “Clear auto backup log“
- “Clear error log“
- “Clear auto backup init key“
This is what the buttons look like:
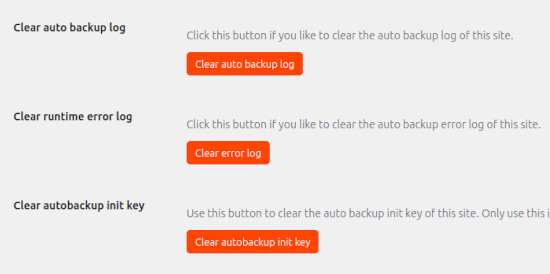
These buttons clear the logs and initialization keys, which is necessary to restart the process cleanly.
- You are now ready to re-enable/restart the scheduled backup process. Make sure that the automatic backup settings are globally enabled. Go to Prime Mover PRO -> Settings -> Backup management -> Automatic backup. And make sure this is checked like this one and click “Save”:
- Go to Prime Mover PRO -> Toolbox.
- [If your site is multisite] Enter the blog ID of the affected site where you want automatic backup to be restarted.
- [required] [If your site is multisite] Go to the Top of the Sites Tools / Scheduled backup settings page, re-check the Enable automatic backup checkbox, and click “Save.” This is what it looks like:
- [required] Under “Backup options,” – make sure to set this and save it.
- [required] Make sure to set also “Backup schedule” and save it.
- [Optional tips for multisite ] Don’t schedule backups for several sites simultaneously. Running backups consumes server resources. Please spread your backup process over different schedules to avoid running them together. This efficiently distributes your server resource usage, which is beneficial for your site. You can assign as many custom schedules as you want for your sites.
- [required] Since you are restarting the process – you might want to be very conservative with your backup timeouts. To avoid hitting a timeout that could disrupt your process, assign the shortest timeout possible under “Retry timeout options” – set the timeout to 20 seconds. This will ensure it will run as most hosting configurations will have server timeout higher than 20 seconds.
- Confirm that the backup schedule is now active. To do this – go to Prime Mover PRO -> Event Viewer. You should see the two sets of events for that site (one for the main schedule and one for the retry checking). This is what it looks like:
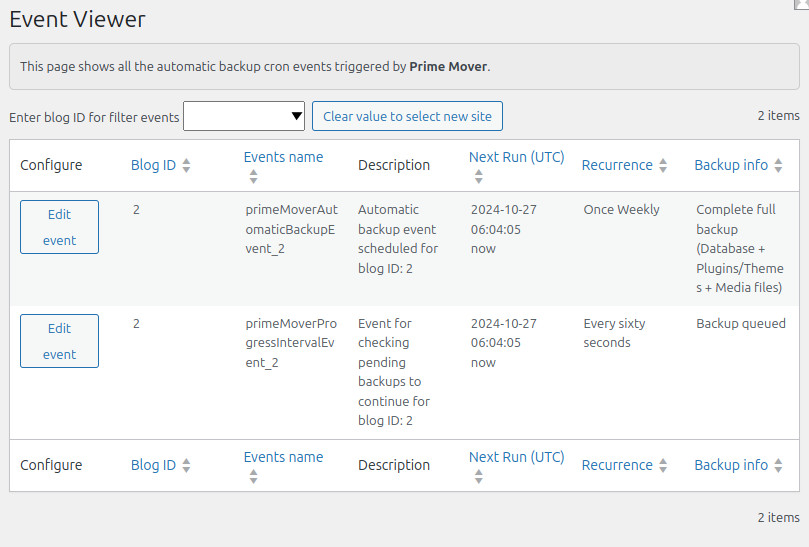
Suppose you see the above two entries for your site. Congratulations! Your schedule backup is now restarted! Please wait for some time until it fires in your set schedule.
Contact tech support
If your scheduled backups still don’t work after restarting them, please open a ticket with technical support. To assist you as soon as possible, please provide your WordPress site login (network admin credentials if your site is multisite) so we can immediately check the problem directly on your affected site.
If your site is multisite, please specify the affected sub-site URL or blog ID so we know which site has issues.
Last updated: January 11, 2025