Scope: Prime Mover Pro / Prime Mover Free
Background
Prime Mover 1.0.7 added new backup management page. This adds a new way of restoring packages with Prime Mover.
This is very useful in case:
- Uploading packages to your site via Tools -> Migration Tools (or Network sites -> Sites in multi-site) takes too long or does not work. Prime Mover by default uses browser upload which is slow.
- Remote URL restoration fails because of insufficient server RAM, or hosting / network related issues.
- You want to restore a big site and that your target hosting server has limited resources (e.g. in shared hosting environment).
Step 1. Create backup package in the source site
In your source site (e.g. the site that you want to migrate or create a backup copy), create an export package.
This could be a single-site or multisite package. It depends on your target site.
If your target site is a single-site, you should create single-site package. Otherwise if its multisite, you should create a multisite package.
Once the export is done, a copy is saved to your Prime Mover backup directory. Go to Prime Mover -> Packages and you should be able to see your newly created package.
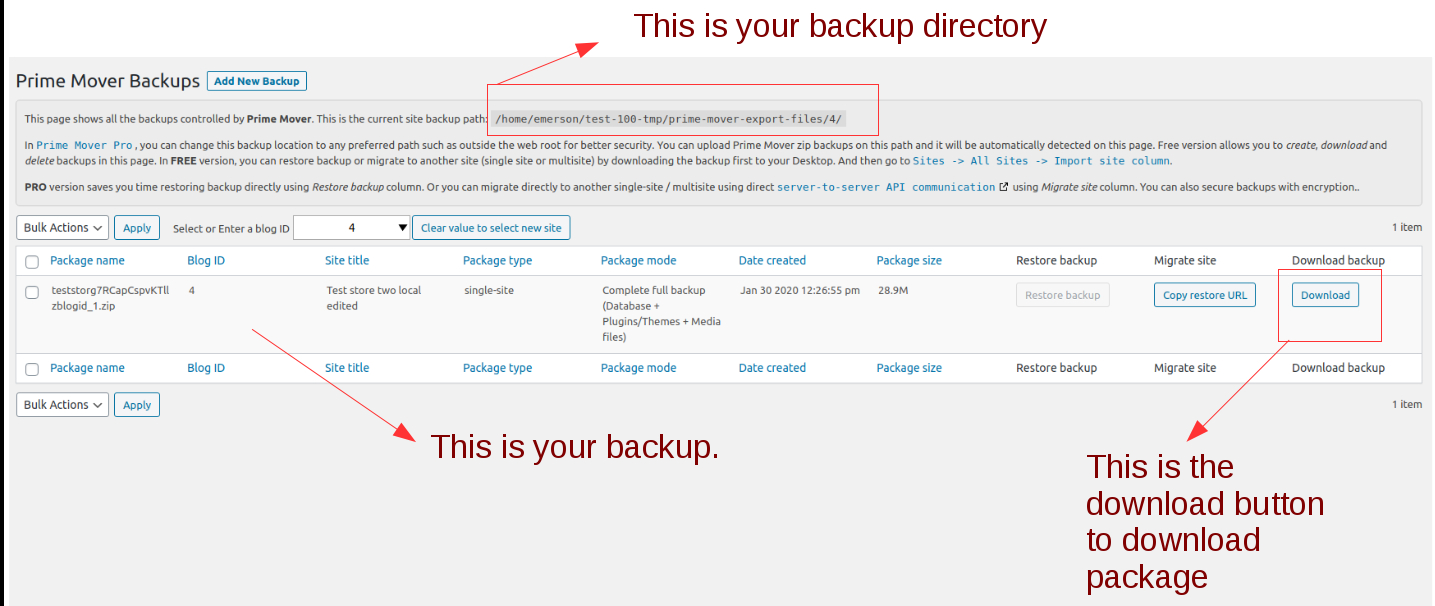
In the above example, I created single-site package in a multisite network because I would like to move this to a single site server in different hosting.
Step 2. Manually copy the package to your target site Prime Mover backup directory
There are several ways to copy the package you have created in Step 1 to your target site. The easiest would be to use the download button (see above screenshot). This will download the package to your Desktop.
This is useful if your target site is local or in your own computer.
If your target site is another remote hosting server, you will need to re-upload that downloaded package using your favorite SFTP client (e.g. Filezilla).
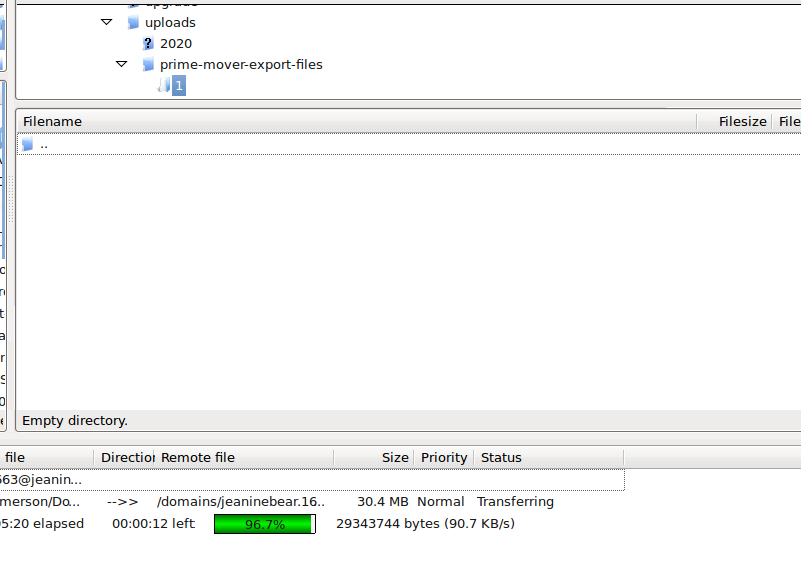
Re-upload it to your target site Prime Mover backup directory. Again your target site needs to have Prime Mover Pro license activated and you can get the path to your backup directory in your target site Prime Mover -> Packages
If you are a command line savvy and knows how to use terminal /shell commands (if supported by your server), you can directly copy from your source site backup directory to your target site backup directory using SCP. This way you will never need to download it to your desktop and re-upload it in the first place.
Step 3. Refresh your target site Prime Mover backups management page
OK now you have uploaded the package to restore to your target backup directory, login to your target WordPress site via admin.
Go to Prime Mover -> Packages and then refresh this page. Or use the Refresh Packages button. You should now be able to see the backup there listed.
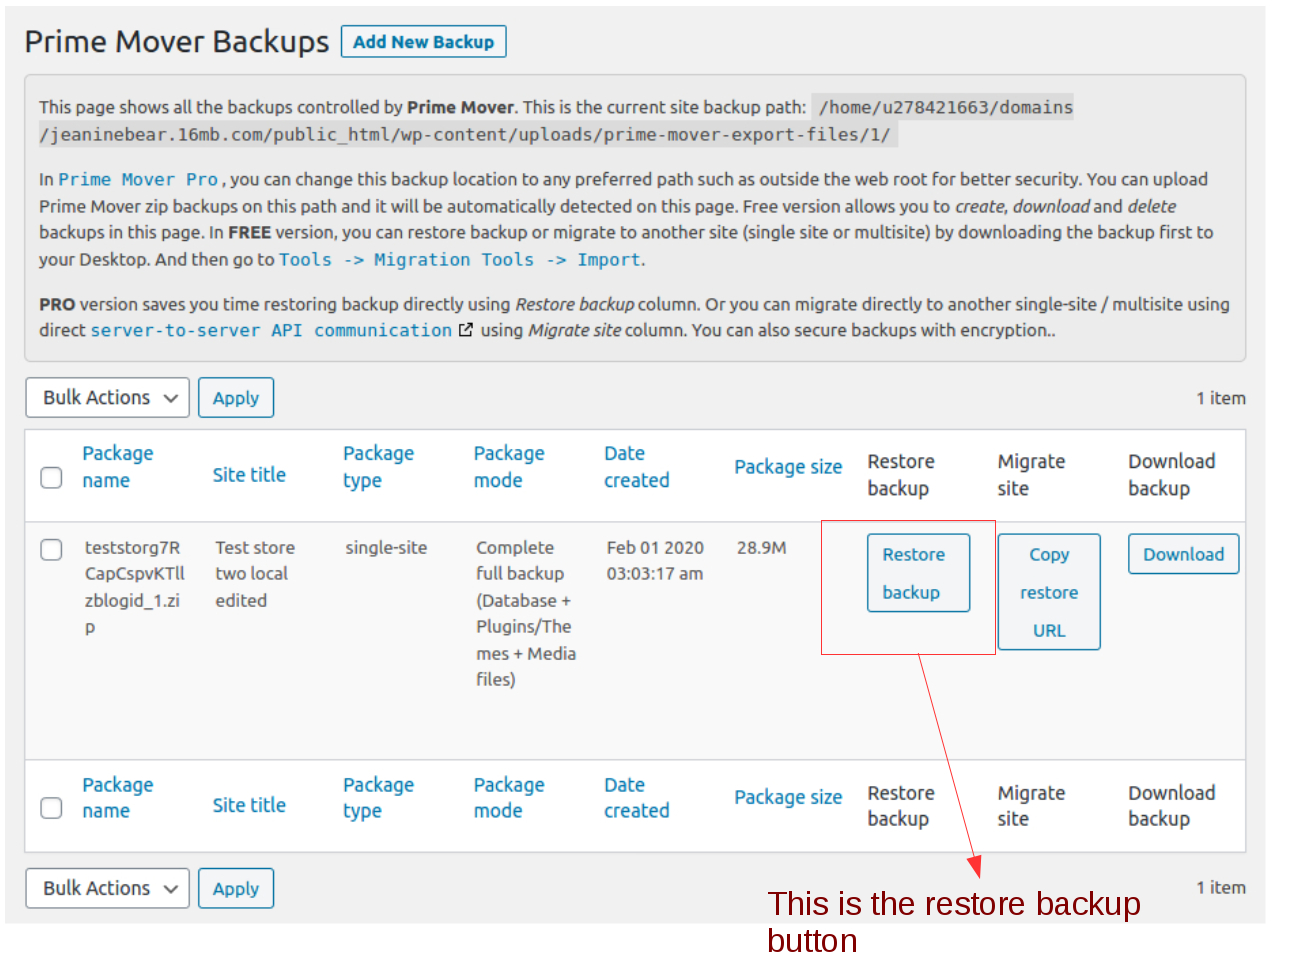
Step 4. Click the “Restore Backup” button
In the above screenshot, you should be able to see the restore backup button activated.
If its clickable, click “Restore backup” button and it will take you to the import confirmation dialog screen.
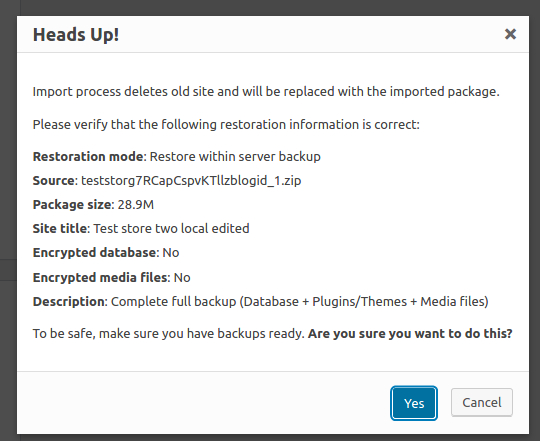
The confirmation dialog shows the details of the site you are restoring. Take a look at the details and see if you are restoring the correct site. If its all correct, click Yes button.
Step 5. The restoration process starts, wait until its done
After you click yes, the restoration process starts. Don’t navigate away from the page or do something with your site. Your site will be put to maintenance mode automatically by Prime Mover.
The import process shows the progress , for example:
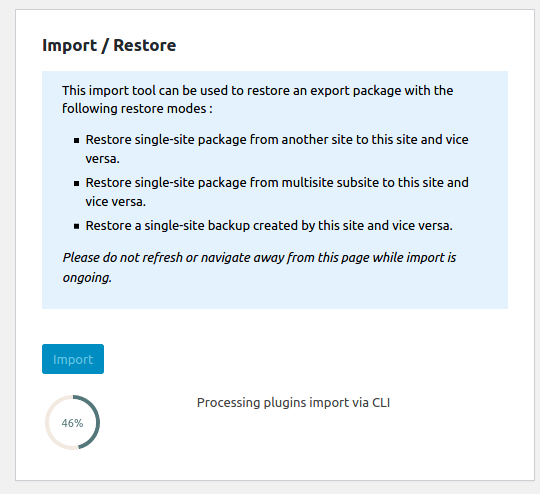
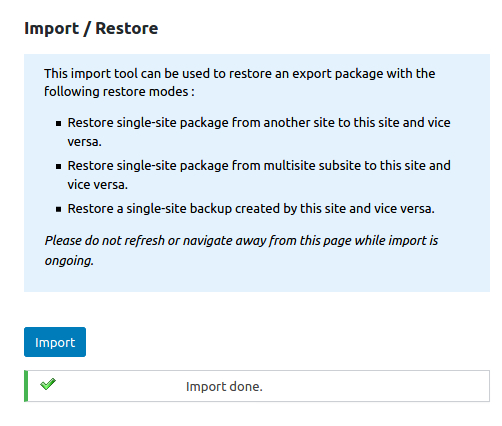
Restoration process time depends on the power of your hosting server and the size of your package. Finally after some time, it should show its done:
Step 6. Refresh permalinks and check frontend
Go to Settings -> Permalinks and re-save permalinks. Then check the front end. It should show the same as your source site.
