Scope: Prime Mover Pro
IMPORTANT : If you are using Prime Mover Pro for the first-time , please read this get started guide first.
Background: Why use Remote URL feature ?
Update: Since Prime Mover version 1.1.5, it now uses WPRIME file extension archiving format. The example shown here is still using the ZIP format which is only applicable in older versions. However, there is no other changes in this feature except for the file extension/archiving format change. This should not affect anything at all to this feature.
It’s the fastest way to restore a site using Prime Mover. The default restoration method of Prime Mover is via browser uploads (available in free version and Pro version also) and also restoring within Prime Mover package manager.
Browser uploads is slow because its subjected to a lot of factors (latency, Internet upload speed, server upload limitations, etc., browser limitations (can upload up to 4 Gigabyte only). Package manager restoration is also a good alternative but that requires you to upload the package to your target site (using SCP/SFTP/FTP). If these are big packages and your connection from your Desktop to your server is very slow or just these are not available – then remote URL feature is an excellent option.
If you use browser upload, restoration is possible but takes a lot of time. Say your origin site is abc.com and your target site is xyz.com. Using browser uploads:
- Generate Prime Mover package in abc.com.
- After export, you download this to your computer (your local desktop or laptop for example). Downloading can take time, depending on your Internet download speed.
- Then you restore it to xyz.com via Prime Mover restore via uploads method. This is usually slow depending factors discussed previously.
Using remote URL, you can bypass downloading/uploading to your desktop (which is time-consuming) and let two sites communicate each other directly using WordPress HTTP API. This is how it works (available in Pro version only):
- Generate Prime Mover package in abc.com and save it to your export directory (don’t download it to your desktop).
- Make sure the PRO export option “Generate package URL for direct site migration” is checked.
- Restore package using remote URL. This is very fast since it uses the hosting server connection speed (usually last seconds to fetch packages). xyz.com will fetch package directly from abc.com. This is not limited to package size(unlike browser uploads) and even if your package more than 4 Gigabytes, it can still be fetched.
First step: Generate Export Package at Origin Site
- In a site using Prime Mover Pro, go to Prime Mover Control Panel.
- Click Go to Migration Tools button.
- Click Export button. The Export Options dialog will pop-up.
- Select Export database, media files, plugins and themes – this will export everything.
- Check Generate package URL for direct site migration . This will generate the restore URL which you can use in the second step.
- [OPTIONAL – not recommended for very big sites] Checked Data Encryption – Encrypt database & media files with industry standard AES-256 encryption. This will encrypt the database and media files. This is also checked by default if supported. On very large sites, this can slow the export process so use this with caution.
- Set Export type (whether you want to export single site or multisite). If exporting to multisite , please input the target sub-site blog ID.
- Finally click Export now.
- It can take time to export the entire package depending on the size of your website.
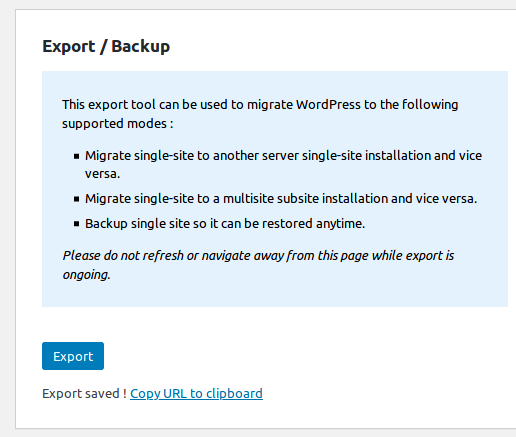
- When its completed, you will see Export saved notice.
- Click Copy URL to Clipboard. A confirmation dialog will show that the URL is successfully copied to clipboard. Click OK to confirm.
[PRO Feature] Second step: Restore Package at Target Site
Note: If you don’t have PRO license activated at target site – you can still migrate by downloading the package at the source site. You can then upload it to your target site via SFTP or cPanel file manager to the target Prime Mover export directory. You can then restore the package via target site package manager. For more details – please check out this tutorial.
The following steps assumes the target site has PRO license activated:
- At target site, go to Tools – Migration Tools (or Network Admin -> Sites -> All Sites in multisite)
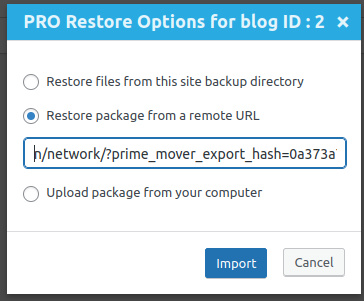
- Click Import button (or PRO restore button under “Import site” column if it’s in multisite network admin)
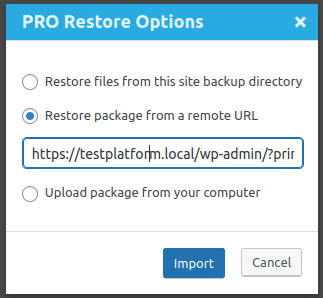
- Select Restore package from a remote URL.
- In the input text box, paste the URL copied from the clipboard (from source site). This is how it looks like:
Tips: There are several types of remote URLs to the package that you can use. Details of this will be discussed below.
If you want to use this PRO feature – please check out pricing page.
Using PRO restore API
NOTE: Please upgrade to Prime Mover 1.6.2 since this now supports two-way remote URL restorations even for single site license.
The first and default implementation (as shown in the screenshot) is the standard Prime Mover remote API URL. The format of this URL is: https://yourtestsite.test?prime_mover_export_hash=2cf24dba5fb0a30e26e83b2ac5b9e29e1b161e5c1fa7425e73043362938b9824&prime_mover_blogid=1
This taken from the source site (where the Prime Mover export package is created or originated) by clicking “Copy URL to clipboard” see screenshot after creating the export package:
Or you can get the Prime Mover remote API URL from Tools -> Migration Tools -> click “Import” button -> click Restore files from this site backup directory at the source site. You should able to see the list of packages created. There is a copy to clipboard button to copy the remote API URL for each of these packages, see screenshot (clicking on it will automatically the API Restoration URL to clipboard so you can paste it on the import end):
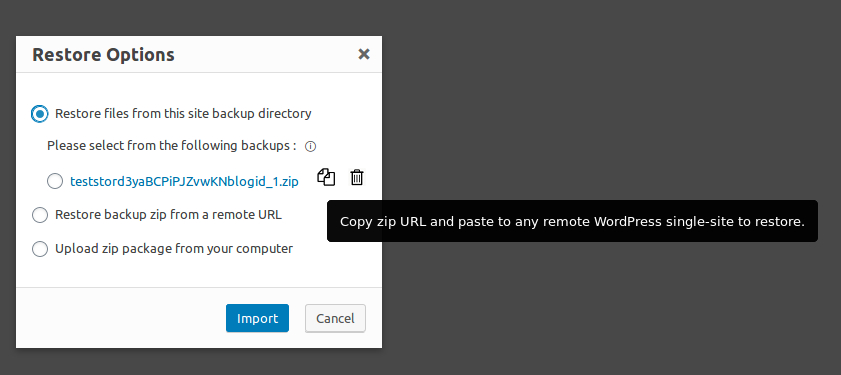
Take note that packages will appear in the list only after they are successfully created (via Exporting packages) and not corrupted.
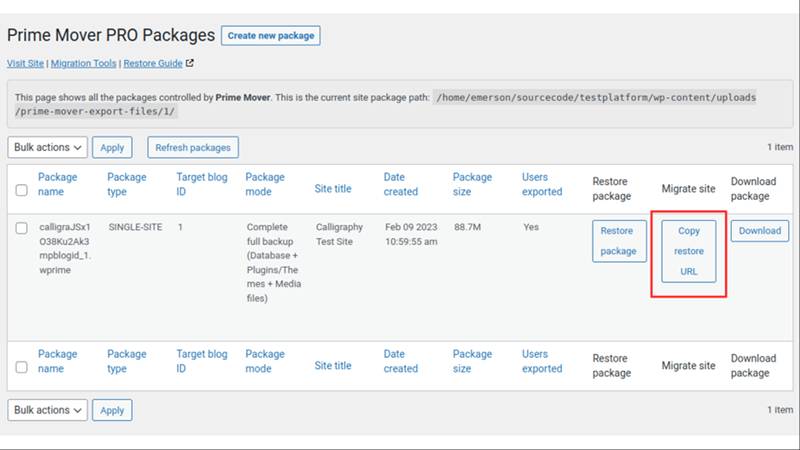
NOTE: If you already done the export and close the windows/browser tabs, etc. You can still get the API restoration URL by logging into your site. Once logged-in, go to Prime Mover PRO -> Packages and load your site packages.
You should see the “Migrate site” column and below it is the button named as “Copy restore URL“. Click this button to copy the restore URL to the clipboard. And then paste this restore URL to your text editor (e.g. notepad) and keep a copy of this in you Desktop. You need this restore URL when you migrate the package in your target site/server.
Using static URL restore method to a valid Prime Mover package
Another type of remote URL restore implementation is any publicly accessible URL that points to a valid Prime Mover package. For example, say you have Prime Mover package you uploaded manually to your WordPress root directory named as myprimemoverzippackage.wprime . Then this becomes a static URL which is:
https://mytest.site/myprimemoverzippackage.wprime
Then use this static URL as your remote URL to import package. TIP: You can use this “static URL” method of using restoring from a site that don’t have an active PRO license. All you need to do is to copy the package out of Prime Mover export directory in the source site that don’t have license to a publicly accessible directory inside your site server (e.g. your WordPress root directory).
Using cloud based URLs pointing to a valid Prime Mover package
Also any URL pointing to a valid Prime Mover zip package hosted in any Cloud solutions can be used. Say for example, you have a Prime Mover zip package uploaded in DropBox and this is the URL: (you can get this by clicking Share -> Create Link in Dropbox) : https://www.dropbox.com/s/abcdefgdxsfdfds/mypackagezip.zip?dl=0
Make sure to set dl=1 as the parameter so it will be a direct download to the zip.
Therefore this is the URL to download the Prime Mover package from the DropBox:
https://www.dropbox.com/s/abcdefgdxsfdfds/mypackagezip.zip?dl=1
Use this URL as your remote URL to restore the site.
How to proceed with the restore?
- Finally once you have remote URL set and pasted, Click Import button. If you see “Unauthorized” error, you need to set authorization keys. Please read this guide for details: https://codexonics.com/prime_mover/prime-mover/how-to-add-and-use-authorization-keys-in-migrations/ . Basically, you create authorization key in the source site and copy that source site authorization key to the target site. This will ensure that target site is now authorized to fetched/download or copy package from source site. This security feature prevents any site or anyone from fetching or downloading your package.
- Tip: Prime Mover validates any URL entered. It will verify if the package is a valid Prime Mover package (which is of zip format), it will reject any URLs that is invalid and you should see errors.
- After starting the import, wait until you see Import is done. It will show progress to each step being processed. This process can take some time depending on the size of your packages.
- Refresh the page.
- Settings – Permalinks. Re-save permalinks.
- Everything should be restored at this point. You can check the front end and back end of the site.
What if I cannot use remote URL feature?
If for some reason this does not work (server security limitations or policies) – then you should be able to restore the package via browser upload OR using package manager restoration. Browser upload is not recommended if you have a very big package or slow upload connection. Using package manager restoration is the best alternative in this case.