Prime Mover Free Version to the rescue!
If you are not aware, there is a free plugin in WordPress.org called Prime Mover that you can use to backup sub-sites in a WordPress multisite. Yes you read it right – free plugin.
In this plugin(covered with free version):
- You can export and download the site backup as a file to your Desktop.
- You keep the backups in your local Desktop.
- A backup copy is also saved in your server so you can re-download any backups when needed.
- You restore the backup by uploading it back to the multisite.
- Done.
Exporting and Creating Backups
Once you have successfully activated the Prime Mover plugin (this plugin can only be network activated in a multisite environment) – it’s time to create backups:
- Login as network administrator (super-admin).
- Go to Network -> Sites -> All Sites.
- You should see two new columns added by Prime Mover. The Export Site and Import Site. These are the tools you need to backup and restore specific sub-sites.
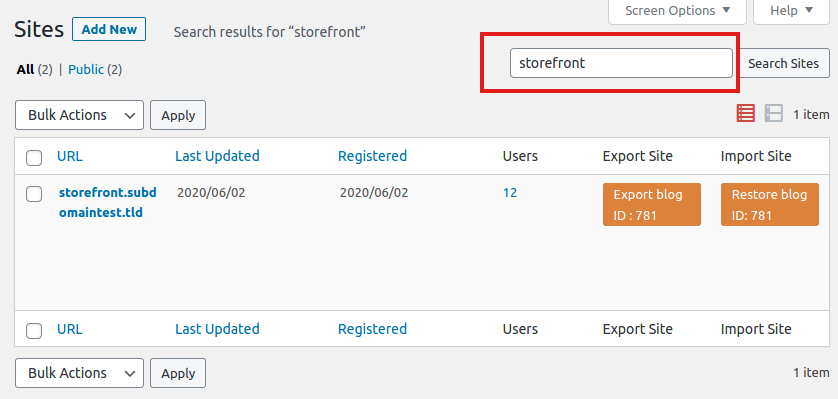
- If you have a lot of sites in a multisite, searching for that sub-site can be quite difficult. You can use the search box to search for the site that you want to backup.
- You can search for the site name, e.g. in this screenshot:
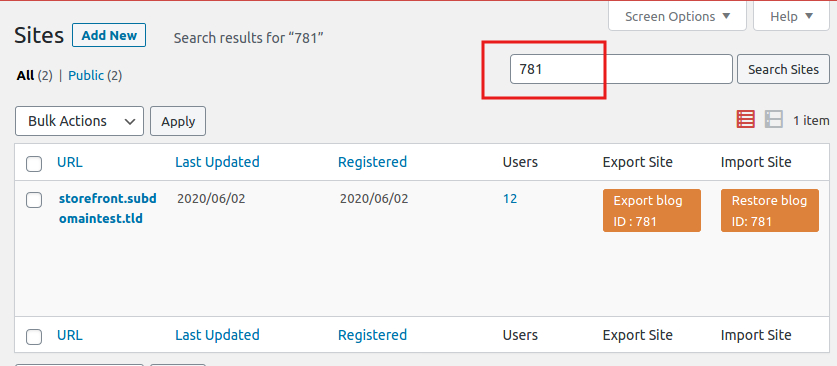
- Or you can search by blog id if you know it:
- Finally supposing you want to backup a specific subsite (storefront.subdomaintest.tld), click Export blog button.
- In the export options, supposing you want to make a complete backup (active plugins/themes, database and media files)

In the Export type – make sure to select “Export as subsite backup” because you want to create backup of that subsite.
- Finally click “Export now” button. It will take some time to export the site. It depends on the size of the sub-site and the speed of your server.
- When the export completes, it will prompt you to download it to your Desktop. You really don’t need to download this every time to you create a backup. You only need to download if you want to restore this package somewhere else (e.g. your local, etc.).
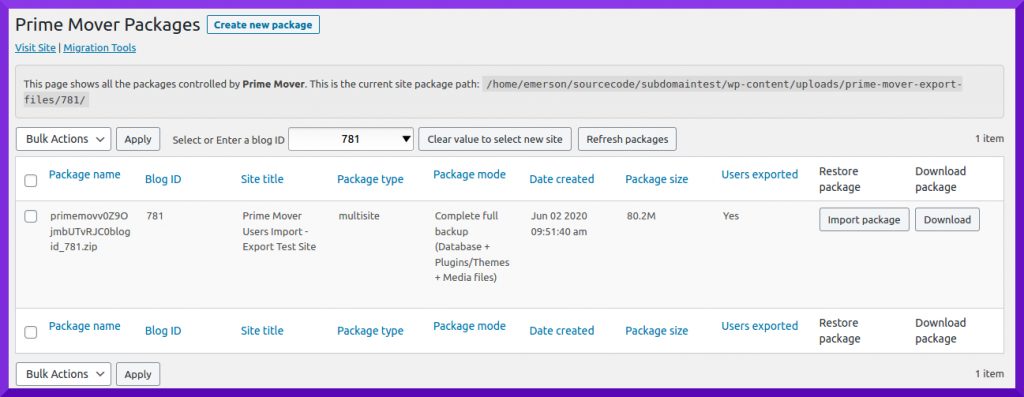
- NOTE: A copy of the backup is automatically saved in your server so you can use it in the future. Simply click “Package Saved!” link. Or you can see this by going to Network Admin -> Prime Mover -> Packages. You might need to enter the blog ID of the subsite you want to query.
- You can see created backups by clicking “Package Saved” link after export or can go to Prime Mover -> Packages. This is how it looks like:
Restoring Backups using Free Version (if backup is already stored within server)
To restore a sub-site backup using Prime Mover free version (assuming you already created the backup):
- Login as super-admin (network administrator).
- Go to Network admin.
- Go to Prime Mover -> Packages.
- Search the package you want to restore and hit restore button. That’s it!
Restoring Backups using Free Version (if backup requires uploading to server)
- Login as super-admin (network administrator).
- Go to Network admin.
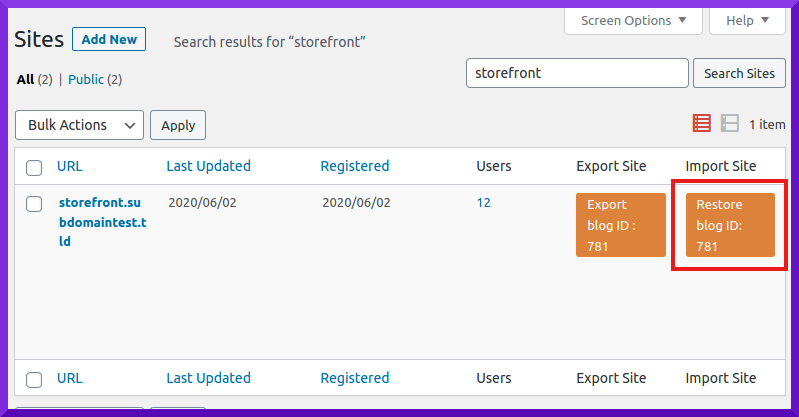
- Search again the site that you want the backup to be restored. (you can use the search box as illustrated previously).
- Click Restore button under “Import site” column:
- Browse to the WPRIME package to restore in your Desktop and then open.
- Prime Mover analyze the package to make sure it is not corrupted and it is appropriate for the sub-site (prevents you restoring wrong backup)
- An import confirmation dialog that shows the details of the package to be restored. For example:
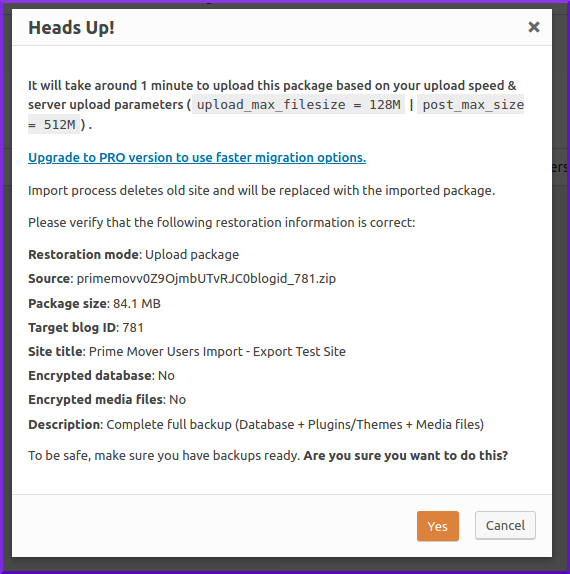
You can check the site title, the package size and site description to verify if you are restoring the correct site. If you are sure the site is correct, click Yes button.
- Prime Mover will then upload the package to your server for restoration. The estimated time to upload this is also computed and shown in the import confirmation dialog earlier.
- Once uploaded, package restoration starts. The restoration time depends on the size of the package to be restored and the speed of your server.
- Finally once it is completed, you should see an import success message.
- Re-save permalinks (recommended) to makes sure front end URL works.
- That’s it. Done.
Restoring Backups using Free Version (if default browser upload is not possible or slow)
There are times when the default upload is not possible due to timeouts, connection issues or simply the package is too large (so it’s very slow). In this case, you need to manually upload the package via SFTP directly to the Prime Mover export directory. This is the detailed tutorial on how to do this step.
Restore and migrate backups in complete, more secure & efficient ways! (Prime Mover PRO)
Using Prime Mover PRO, you can do a lot of things to your backups such as:
- Encrypt your WordPress database, upload media files, plugins and themes.
- Restore via remote URL (using WordPress API).
- Export and restore package from Google Drive.
- Export and restore package from Dropbox.
- Move backup directory to outside web root (you can specify this as long as its server writable). This makes your backups more secure.
- Exclude some network activated plugins from your backup.
- Exclude some unneeded WordPress media upload files from your backup.
- Backup and migrate main site.
Upgrade now to PRO version to get all of these features! Or you can send us a message if you have some questions.